Guide – ActiaCity Share Interface![]()
To access NEW INTERFACE of ActiaCity, click on
the logo:

The old interface is here: https://www.actiacity.com/alfresco
------------------------------------------------------------------------------------------------------------------------
Table
of Contents
Upload a document / several
documents
Upload a new version of a document
------------------------------------------------------------------------------------------------------------------------
Home
Page
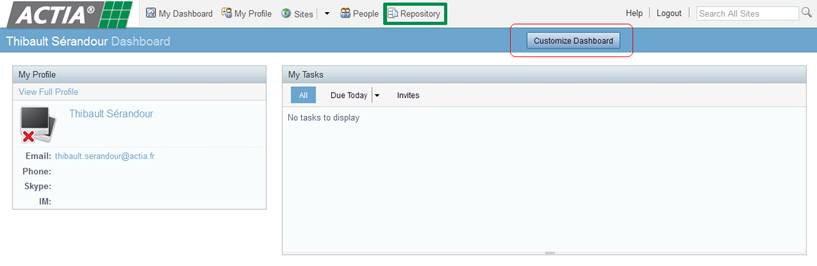
First,
it is advisable to configure your dashboard as illustrated below by clicking on
“Customize Dashboard”.
Secondly,
click on “Repository” to access the “Streets”, “Buildings” and “Documents”
Repository
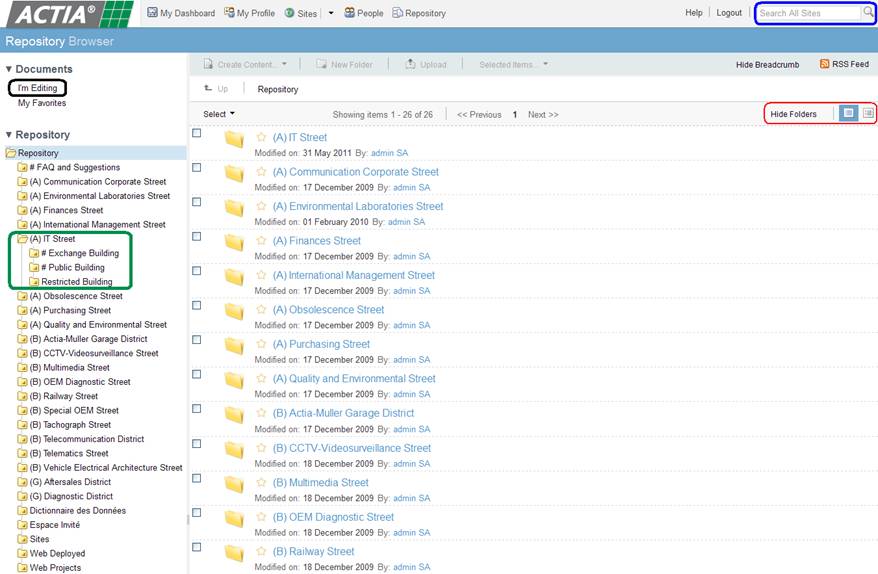
The
image below introduces the new file browser of ActiaCity.
-
On
the left is the file tree. In the example below, the “IT Street” (circled in
green) is open.
-
Above
file tree, circled in black, you will see the button “I’m Editing” which gives
you a quick access to documents you are currently editing “offline” and locking
to others.
-
In
the main window, you will see the file tree with viewing options (circled in
red, above).
-
At
the top right, you will find the search bar (circled in blue). Remember search
is done using “full-text”.
Upload
a document / several documents
To
upload one or several documents:
1)
Go
to the working folder (here, for example we go to “IT Street > # Public
Building”).
2)
Click
on the button “Upload”.

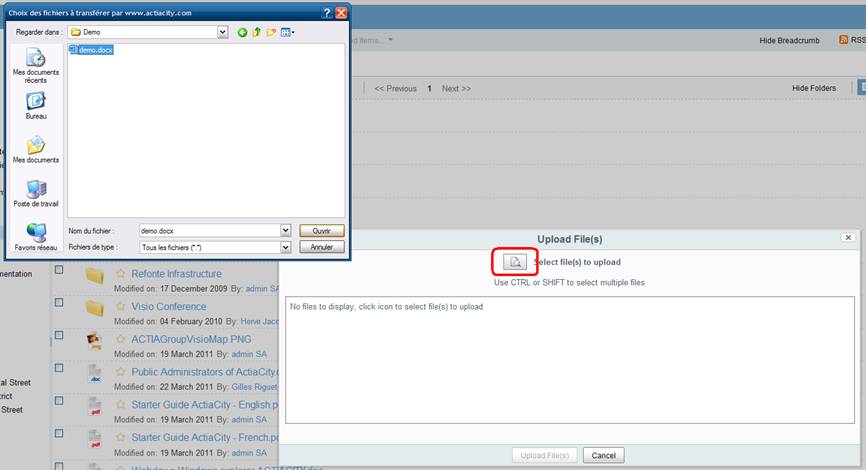
3)
Click
on the button circled in red and select one or several documents you want to
upload (uploading a folder doesn’t work).
4)
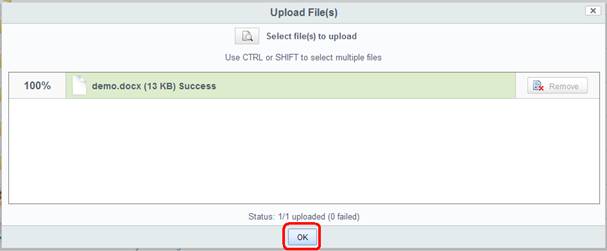
You
just have to click on the button “Upload File(s)” and watch the progress in
real time. When upload has finished, click on “OK” (circled in red).
5)
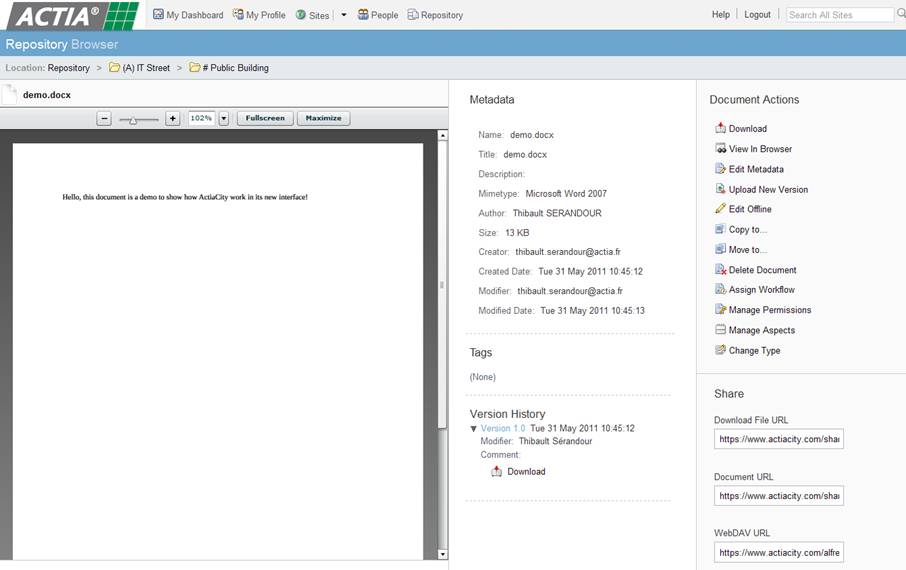
The
document is uploaded to the working folder. When you click on it, a new page is
opened and you can see the document without having to download it.
All actions available for this document are on the right.
The new ActiaCity can
be used to view all Microsoft Office documents, PDF documents and Picture
documents without downloading.
Upload
a new version of a document
To
upload a new version of a document (with the version history):
1)
You
have two solutions to upload a new version of a document: in the document page
or in the repository (circled in red in the image below).
If you click
on the "Upload New Version" button, the document is not locked for
editing! Other users cannot see that you are working on this document (indeed
they may be in the process of working on the same document which will risk
version conflict).
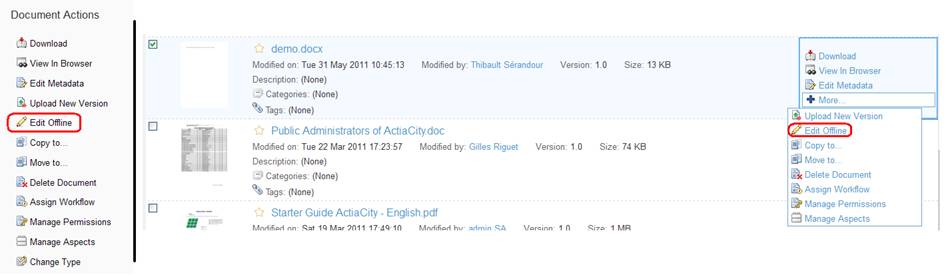
2)
When you click on the “Edit Offline” button, the
document is automatically locked and cannot be edited by other users. Other
users may only read the document, and are made aware that a colleague is
working on the document.
A download pop-up
appears. You must download it! This is
the “check-out’ process.
3)
After
downloading the document, you can edit it on your local machine (using
Microsoft Office for example).
4)
When
you are ready to upload the new version of the document, go to the repository
and click on the button “I’m Editing”.
Select the document concerned and click on the button “Upload New Version”
(circled in red in the image below).

5)
After
clicking on “Upload New Version”, a pop-up appears and asks you to select the
document updated on your local machine (circled in red) and choose one option
of new version. This is the “check-in”
process.
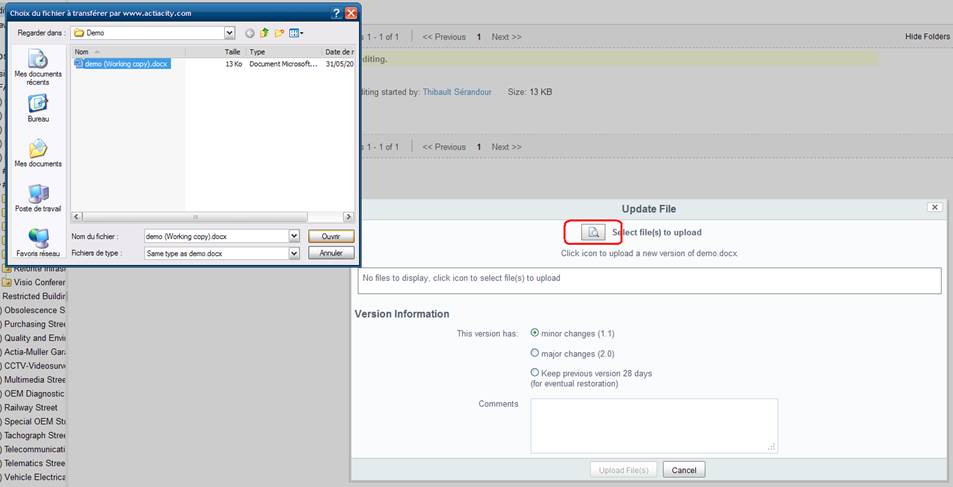
o
“minor
changes (1.1)”: your new version of the document has the version number 1.1
o
“major
changes (2.0)”: your new version of the document has the version number 2.0
o
“Keep
previous version 28 days”: your new version of the document has the version
number 1.1. The previous version will be kept 28 days in case you want to
restore. After 28 days, the document is deleted. Restoration is still possible
via the administrator for a further 28 days.
o
“Comments”:
you can put a comment for the new version.
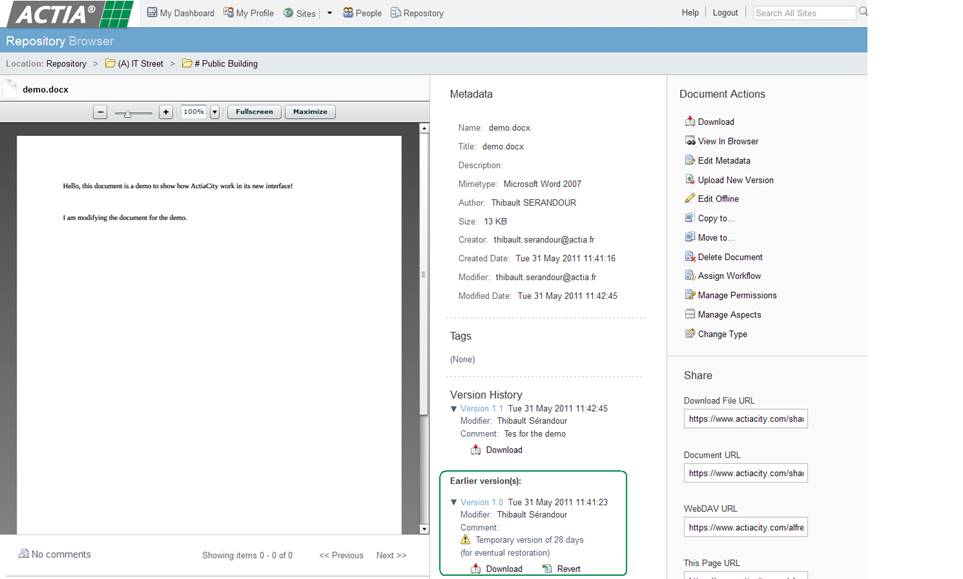
6)
After
uploading the new version, in the document page, you can see the version
history (in the example below, earlier version is a Temporary version 28 days
circled in green).
Specific
Options
Revert
a document version
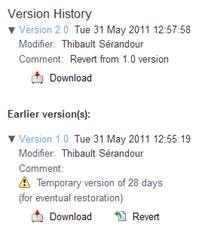
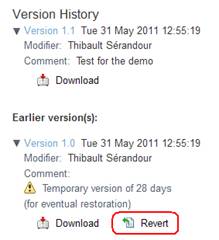
To revert
to earlier version of a document, go to the document page, select the version
you want to restore and click on the “Revert” button. The earlier version will
be restored with a higher or lower version number according your restoration
instruction.
In the
following example, version number 1.0 is restored using version number 2.0 with
a comment:

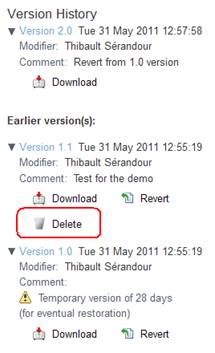
Delete
a document version
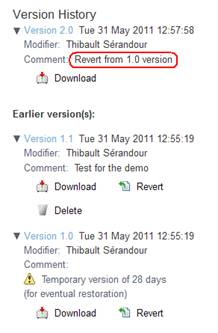
In the
new version of ActiaCity, versioning is always
enabled. To save space, delete versions should occasionally be deleted.
To
delete intermediate versions, go to the document page in “Version History” and
click on the “Delete” button on the version you want to delete.
In the
following example, version number 1.1 is deleted: